- Published on
Using LIT with ASP.NET Core MVC [Part 2]
- Authors

- Name
- Mathias Hove
- @mathias_hove
Getting started
Let's create a blank ASP.NET Core MVC project. This can be done by typing:
dotnet install mvc -n projectName
Now navigate to projectName
cd projectName
In this directory, we should see our ASP.NET Core MVC project.
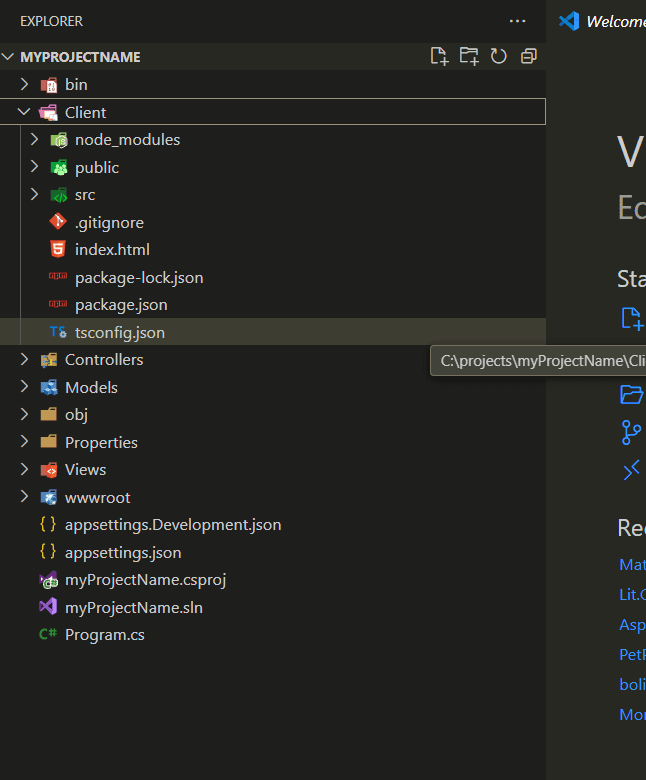
Let's install our client code from here. This is just a proof of concept, so I will create a folder specifically for the client code inside our project root. For a real-world project, this would ideally be in its own separate folder.
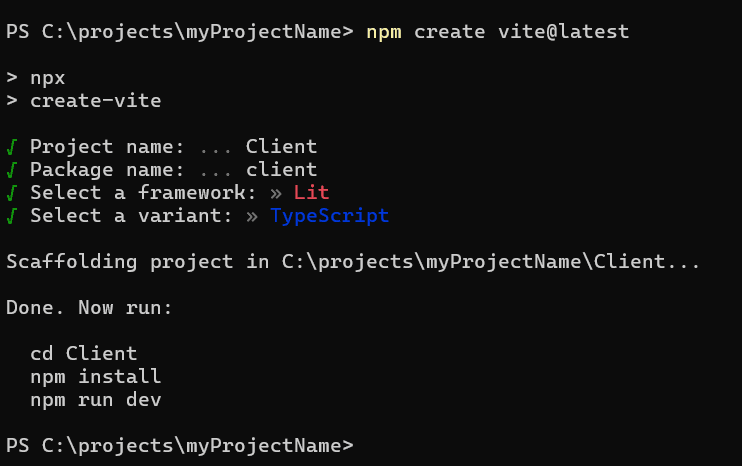
Now let´s install Lit. We can do that using Vite. Read more about the prerequisites for using Vite here.
npm create vite@latest

Let's execute the suggested commands.
Inside the client folder, we need to install some dependencies. Run:
npm install bootstrap --save-dev

Delete everything inside the src folder except for vite-env.d.ts.
Next, create a file named main.ts inside src and add the following code to main.ts:
// style
import './scss/site.scss'

// VITE import all Lit components
import.meta.glob('./**/*', { eager: true })
Create a folder named elements. Inside this folder, add a file named Counter.ts.
import { html } from 'lit'
import { customElement, property } from 'lit/decorators.js'
import { LitElement, unsafeCSS } from 'lit'
import bootstrap from 'bootstrap/dist/css/bootstrap.css?inline'

@customElement('my-counter')
export class Counter extends LitElement {
  static styles = unsafeCSS(bootstrap)
  constructor() {
    super()
    this.count = 0
  }

  @property({ type: Number })
  count = 0
  increment() {
    this.count++
  }
  render() {
    return html`
      <h2>Counter</h2>
      <p role="status">Current count: ${this.count}</p>
      <button class="btn btn-primary" @click="${this.increment}">Click me</button>
    `
  }
}
The counter will be our component, which we'll add to our ASP.NET Core project.
Configure Vite
Now, let's configure Vite.
Add a file named vite.config.ts in the Client folder.
/**
 * Name: vite.config.ts
 * Description: Vite configuration file
 */

import { UserConfig, defineConfig } from "vite";

// Pattern for image files
const imagePattern = /\.(png|jpe?g|gif|svg|webp|avif)$/;

// Export Vite configuration
export default defineConfig(async () => {
  // Ensure the certificate and key exist
  // Define Vite configuration
  const config: UserConfig = {
    clearScreen: true,
    appType: "mpa",
    root: "Client",
    publicDir: "public",
    build: {
      emptyOutDir: true,
      outDir: "../../wwwroot/components",
      assetsDir: "",
      rollupOptions: {
        input: ["src/main.ts"],
        // remove hashing, but I could add it back in
        output: {
          // Save entry files to the appropriate folder
          entryFileNames: "js/[name].js",
          // Save chunk files to the js folder
          chunkFileNames: "js/[name]-chunk.js",
          // Save asset files to the appropriate folder
          assetFileNames: (info) => {
            if (info.name) {
              // If the file is an image file, save it to the images folder
              if (imagePattern.test(info.name)) {
                return "images/[name][extname]";
              }

              // If the file is any other type of file, save it to the assets folder
              return "assets/[name][extname]";
            } else {
              // If the file name is not specified, save it to the output directory
              return "[name][extname]";
            }
          },
        },
      },
    },
  };

  return config;
});
We configure Vite to bundle our components and point it to the wwwroot folder in our ASP.NET project.
Now let´s se if it works. Edit package.json replace "build": "tsc && vite build" with "watch": "vite build --watch"
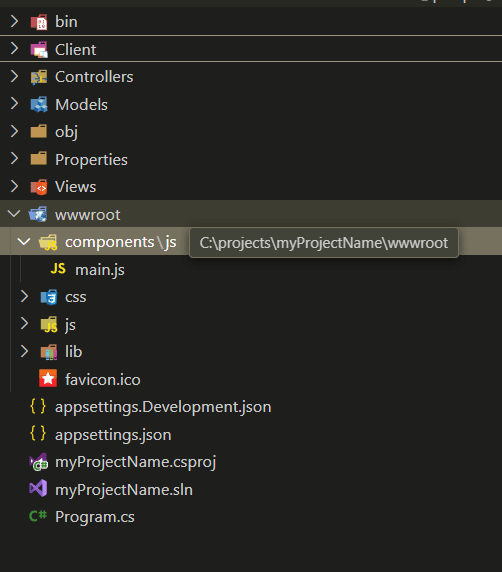
Now, navigate to the Client folder and run npm run watch We should now have some a new components folder in our wwwroot and our files. We should now see a new components folder in our wwwroot directory containing our files.

What happens is that the input file is set to main.ts in our src folder. The main.ts file imports all of our custom LIT elements.
Vite then bundles the code and outputs it to our wwwroot folder.
Let´s set up our ASP.NET Core project.
In our _Layout.cshtml, we need to add @RenderSection("head", required: false) right above the </head> element. `

This allows us the flexibility to reference our components only on the pages that depend on them.
Let´s create a new page in our project. In our HomeController add:
    public IActionResult Components()
    {
        return View();
    }
Under /Views/Home we must add corresponding view: Components.cshtml
Add the following markup to the file. As you can see, we are now referencing our component on this specific page only.
@{ ViewData["Title"] = "Custom Components"; } @section head {
<script type="module" src="~/components/js/main.js" asp-append-version="true"></script>
}

<my-counter></my-counter>
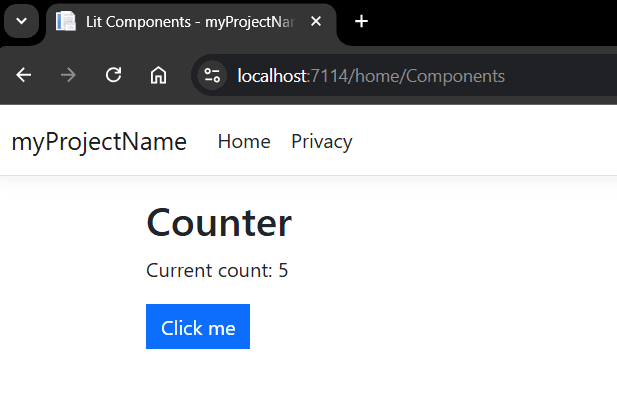
Lets test it out!

This is a rough outline, but it should give you a general idea of how to get started. In a future post, we will refine this further and explore some of the options available for using LIT with ASP.NET Core.
Link to Git repo can be found here